
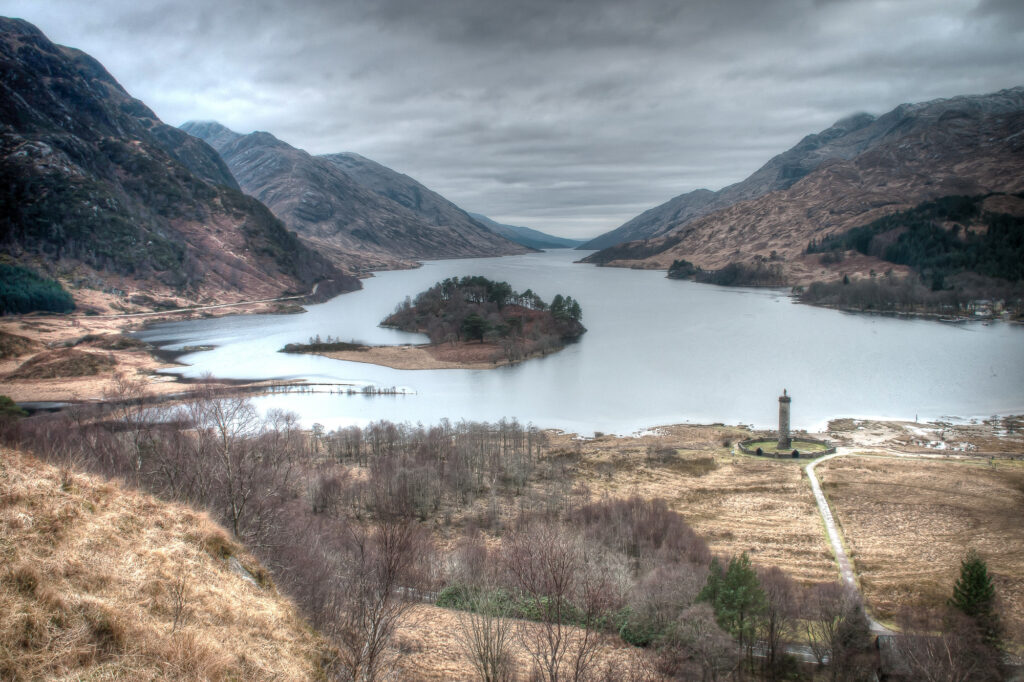
Shoot Landscape Photographs
Landscape photography is probably the most popular type of photography. You can do it anywhere. I often get asked questions on the subject so decided to do a Landscape Photography How To.
Deciding where to go.
The first thing you have to do is pick a location. Decide where you are going to go to get these wonderful landscape images you want to take. You have to research the location and plan for things like the weather, time of day (sunrise and sunset), tides if it’s a seaside location.
Get maps of the area and work out where the sun will be and when, what will be in shadow. Better still visit the location and take notes if you can. Doing this will help give you a clear idea what to expect on the day of the shoot.
Clothing.
What are you going to wear on the day of the shoot? Make sure you are prepared for all weathers. In most places the weather will change throughout the day. Shorts in the afternoon might be fine but when it starts to get cold in the evening, how will you feel then. I recommend long trousers at all times. They will offer protection against more than just the cold. A hat is also a good idea. Wear layers so if it’s hot you can take something off and if it gets cold you have extra layers to put on. It’s no fun getting cold and wet.
Camera Gear.
I often get asked what equipment should I take? My answer is always the same. No more than you can carry. If you are using a DSLR then something wide around 17-40mm is good for sweeping landscapes and good depth of field. A 50mm with large aperture will come in useful also. You will also want a mid range zoom around 70-200mm. That should cover just about any situation that you come across.
What is in my bag?
I carry a two Sony A7iii cameras with lenses to cover wide angle to telephoto so 16mm to 200mm F4 lenses. This will cover just about any given situation.
Accessories.
I also carry the normal accessories that you would expect. Camera cleaning equipment, cable release, spirit level. With all that packed into a photo backpack I still manage to carry a tripod. The tripod being the one item I cannot be without.
Filters.
In landscape photography you will be very lucky if you ever come across a scene that you can expose the sky, the background and the foreground without using any filters and get a correct exposure.
I normally take some ND Neutral Density Grad filters, ND Neutral Density solid filters and a Polarizer. The ND filters will help me to balance the exposure. The solid ND filter will allow me to use slow shutter speeds to show movement. The polarizer will help to saturate colours and cut down on reflections on non metallic objects.
Get the basics right.
We all should be aware of the rules of composition. The rule of thirds, Leading lines and also things like foreground interest and use of colour, these all come into their own in landscape photography.
When you know the rules and you know what works and why it works, it is also a good idea to try things that break the rules. If it does not work out, It’s no big deal, you will not know until you try. You don’t always have to go with the conventional. Sometimes it pays off to be unconventional.
Setting up your camera.
Metering options. Modern cameras are very clever and will not be fooled easily, but it’s you that has to know how to set the camera up for best results. When you are doing landscape photography you are normally looking at a wide area including the sky. You want to get an average reading and you can then adjust for any highlight or shadow areas. I would recommend that you use Multi zone metering, it will normally give you the best result.
Exposure Mode. I normally have my camera set to aperture priority mode, this allows me to set the aperture and the camera then sets the appropriate shutter speed to get the correct exposure. I also use exposure compensation when needed. This gives me a lot of control over the exposure.
Note that it is important to take the meter reading before you attach any filters such as a neutral density graduated filters as the filter will affect the exposure.
ISO. It is important that you use the lowest ISO setting to get the best quality of image you can. There is nothing wrong with increasing the ISO to allow you to get the shot but the higher the ISO the more noise you are likely to get especially when the light levels start to go down. Night time images are more likely to suffer from noise. If you remembered to take your tripod with you this will not be an issue.
Aperture. If you want to get images with front to back sharpness you should be setting a small aperture around F11-F16 or F22 with a wide angle lens you will be able to maximize depth of field and have everything in the shot appear sharp. With a longer lens you can expect to use f22 to get the same depth of field.
Shutter speed. Shutter speed will be set automatically by the camera. Make sure it is not beyond the limits of the camera or you will get images that are too dark or too light. Always check the exposure and make any necessary adjustments. Read my article on The Exposure Triangle.
Time of day.
Morning and late evening. The time of day will play a very big part in what images you take home with you. Make the effort to get up early and get to your location so you get the early morning light. The warm colours in the early morning and late evening can make or break an image. So if your energy levels allow you, you should get out early and stay out till after sunset to get the best of the light.
Middle of the day. This is when many photographer pack up and head home. In the summer months, if you don’t mind working with strong light and harsh shadows then nobody says you have to stop taking photographs. This is a good time however to take a break and eat something and replenish your energy. In the winter months this is normally not a problem as the sun does not rise as high in the sky.
It is not unusual for me to go out in the dark and return in the dark after having taken photographs throughout the whole day.
The Weather.
Most of us could talk about the weather all day. When it comes to the weather it can be your friend or your worst enemy. There is no feeling in the world like sitting in a car at the end of the day waiting for the rain to stop when you have not taken one good shot all day. I have done it many times.
On the other hand when the weather plays along you will get some of the best shots of your life.
Make the most of the weather. Use the sky as part of the shot use the clouds, use sunlight and shadows to make your images stand out.
Typically you want to have a mixture of sunshine and cloud as it will maximize your opportunities to get the best images.
If all else fails you can always resort to black and white and still get some very nice images.
What to photograph?
Well what you will photograph will depend on where you are. What you have to do is not only look but see. Look at the big picture and by all means take a panorama shot but how many other shots can you see within that image.
When doing landscape photography a few steps to the left or to the right can have a big impact to the scene in front of you. For the same reason, nobody said you had to stand up for all your photographs. What does a scene look like from lowdown? Experiment!
Experiment.
Use movement in your images. Use a small aperture that allows you to use a slow shutter speed to catch movement if water. Water looks great when you use a shutter speed around 1/15 of a second. Use a faster or slower shutter speed to get the effect you want.
If you can’t get a slow enough shutter speed, use your neutral density filter to make it possible. You can also use your polarizer filter to do the same thing.
Don’t be afraid to use a small aperture to enhance your shots. Not all landscapes benefit from a large depth of field.
Problems.
Some of the problems you might face when out doing landscape photography.
Camera shake.
You should use a tripod when out taking landscape photographs. Even when you do use a tripod it can still be a problem, caused because the wind is too strong. Use your camera bag to weigh down the tripod and make it more stable.
If using a a tripod and lens with image stabilization turn it off. This feature can cause images to be blurry. Turn it back on again if hand holding your camera.
Flare.
Flare can be caused when shooting into the sun (contre-jour) most often when the sun is low in the sky. You can avoid that by using a lens hood to shield the lens.
In conclusion.
Where you go and what you shoot is up to you. The information here will not answer all your questions but I do hope that you take something from it.
Landscape photography is an art and like anything you must practice to see improvement, the more you do it the better you get. Don’t expect to get the shot every time you go out and be ready to work with what you have in front of you.
Except the weather for what it is, and make the most of it. If you don’t get the shot you wanted use the day as a scouting exercise so the next time you have a better chance. Above all enjoy your photography and never put yourself or others in danger. So get out there and shoot landscape photographs you can be proud of.
Check out my YouTube channel Here. You can also read my post on Panorama images
Pingback: Essential Filters to improve your photography | 2nd Square Photography
Pingback: What is Depth of field | 2nd Square Photography
Pingback: Understand the Exposure Triangle | 2nd Square Photography
I do consider all the ideas you have introduced
on your post. They’re very convincing and can certainly work.
Nonetheless, the posts are very quick for starters.
Could you please lengthen them a bit from next time? Thank you
for the post.ダッチワイフ
Hello There. I found your blog using msn. This is an extremely well written article.
I will be sure to bookmark it and return to read more
of your useful information. Thanks for the post.
I will definitely comeback.ダッチワイフ
Very energetic post, I loved that bit. Will there be a part 2?Look into my page: beşiktaş falcılar
There will be additional posts on Landscape photography. What aspect of photography would you like to read about? Do you have a question?
Hi there! Do you use Twitter? I’d like to follow you if that would be okay.
I’m absolutely enjoying your blog and look forward to new posts.ラブドール 中古
Hi, I don’t use twitter but you can follow me on Youtube https://www.youtube.com/channel/UCfl9CpXNyMf9EXPFVBZbp3A
Thank You! I’m happy you liked the post.